리액트 네이티브(React Native, RN)에서 코드를 구현하다보면 웹뷰(Webview)와 커뮤니케이션을 해야되는 상황이 생기는데요. 이때 리액트 네이티브에서는 인터페이스(Interface)를 활용해서 웹뷰와 커뮤니케이션(통신)을 할 수 있게 제공해주는 기능들이 존재합니다. 이번 포스팅에서는 이러한 기능을 소개하고, 앱 부분에서 처리하는 부분과 웹뷰에서 처리하는 부분을 나눠서 설명을 하도록 하겠습니다.
웹뷰 -> 앱
웹뷰(Webview) / 웹 코드
onMessage 이벤트를 활용한 간단한 예시를 다뤄보도록 할까요? onMessage 이벤트가 발생하는 조건은 웹뷰에서
ReactNativeWebView.postMessage가 실행되어야 됩니다. ReactNativeWebView.postMessage의 매개변수로 hello 문자열을 웹뷰에서 앱으로 전달합니다.
// Webview Script
(() => {
  ReactNativeWebView.postMessage("hello!"); // ReactNativeWebView.postMessage를 사용해서 앱으로 값을 전달한다.
})();

리액트 네이티브(React Native, RN) / 앱 코드
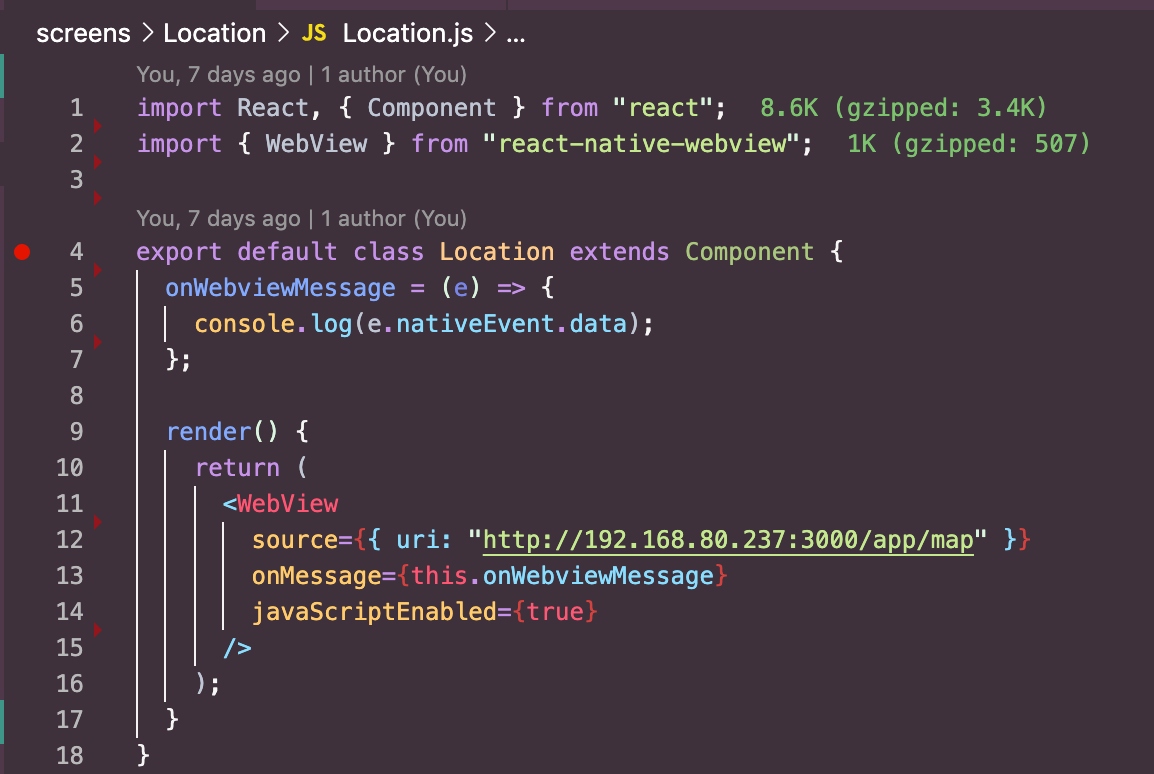
앱에서 웹뷰(Webview)에서 전달하는 데이터를 받는 핵심은 웹뷰에서 ReactNativeWebView.postMessage를 통해 전달한 데이터를 Webview 컴포넌트의 onMessage 이벤트를 통해서 받는 것입니다. 아래 예제는 웹뷰(Webview) 컴포넌트의 onMessage 이벤트를 this.onWebviewMessage 메서드로 연결하고 웹뷰에서 전달해주는 값을 매개변수로 받습니다. this.onWebviewMessage 메서드의 매개변수로 전달받은 e.nativeEvent.data에 접근하면 웹뷰에서 전달해주는 값을 확인할 수 있습니다.
import React, { Component } from "react";
import { WebView } from "react-native-webview";

export default class Location extends Component {
  ...
  onWebviewMessage = (e) => {
    console.log(e.nativeEvent.data); // hello!
  };

  render() {
    return (
      <WebView
        source={{ uri: "http://192.168.80.237:3000/app/map" }}
        onMessage={this.onWebviewMessage} // 웹뷰와 통신하는 핵심
        javaScriptEnabled={true}
      />
    );
  }
}
onWebviewMessage = (e) => {
  console.log(e.nativeEvent.data); // hello!
};

이렇게 리액트 네이티브의 웹뷰 컴포넌트에서 제공하는 onMessage 이벤트를 활용하면 굉장히 간편하게 웹뷰(Webview)와 앱(React Native App) 사이에서 데이터를 주고 받을 수 있습니다. 그럼 반대로 앱에서 웹뷰로 데이터를 전달하고 싶을 때는 어떻게 할까요? 앱에서 웹뷰로 데이터를 전달하기 위해서는 몇 가지 추가적인 작업이 더 필요합니다.
앱 -> 웹뷰
웹뷰(Webview) 컴포넌트가 로드되었을 때 웹뷰에게 "hi webview!" 문자열을 전달하는 예시를 구현해보겠습니다.
리액트 네이티브(React Native, RN) / 앱 코드
웹뷰(Webview) 컴포넌트가 로드되었을 때 호출되는 onLoad 이벤트에 this.onLoadWebview 메서드를 추가하고, this.onLoadWebview 메서드에서 Webview 컴포넌트의 ref 참조값을 활용해서 웹뷰로 데이터를 보냅니다.
import React, { Component } from "react";
import { WebView } from "react-native-webview";

export default class Location extends Component {
  onLoadWebview = () => {
    this.webref.postMessage("hi webview!"); // this.webref.postMessage로 웹뷰로 메시지를 전송한다.
  };

  render() {
    return (
      <WebView
        ref={(r) => (this.webref = r)} // 웹뷰 컴포넌트의 참조값을 this.webref에 추가한다.
        source={{ uri: "http://192.168.80.237:3000/app/map" }}
        javaScriptEnabled={true}
        onLoad={this.onLoadWebview}
      />
    );
  }
}
웹뷰(Webview) / 웹 코드
웹뷰 글로벌 스코프에 __WEBVIEW_BRIDGE__ 객체를 추가하고 init 메서드를 구현합니다. init 메서드 내부에서는 init 메서드가 실행되었을 때 document에 message 이벤트 리스너를 등록합니다. 핵심은 웹뷰(Webview)에서는 message 이벤트를 활용해서 앱에서 전달한 데이터를 받을 수 있습니다.
// Webview Script
(() => {
  window.__WEBVIEW_BRIDGE__ = {
    init: function() {
      try {
        document.addEventListener("message", e => alert(e.data)); // message 이벤트 리스너 추가
      } catch (err) {
        console.error(err);
      }
    }
  };

  window.__WEBVIEW_BRIDGE__.init();
})();
구현 예시
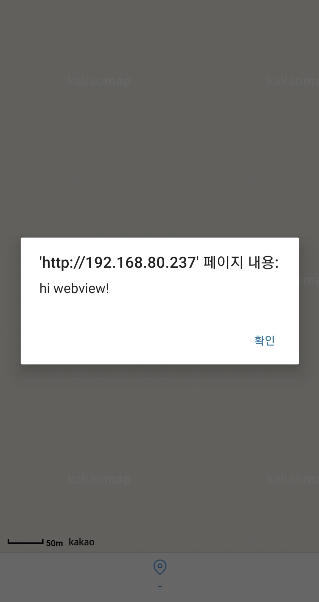
아래 예시를 보면 정상적으로 앱에서 전송한 데이터를 웹뷰에서 message 이벤트를 통해서 전달받은 것을 확인할 수 있습니다.
실제 사용 예시
지금까지 기본적으로 앱과 웹뷰 사이에서 message 이벤트를 활용해서 커뮤니케이션을 하는 방법을 알아봤습니다. 기본적인 개념에 대해서 알아봤으니 이제 실제로 개발할 때 어떻게 활용하면서 사용할 수 있는지 실제 사용 예시를 들면서 설명해보도록 하겠습니다.
구현할 예시는 리액트 네이티브에서 받은 위치정보 데이터를 웹뷰로 전달하고, 웹뷰에서 구현된 카카오맵에 전달받은 위치정보 (위경도) 데이터를 마커로 표현해보겠습니다.
리액트 네이티브 앱에서 카카오맵(카카오 지도)을 사용하는 방법은 여기에서 확인할 수 있습니다.
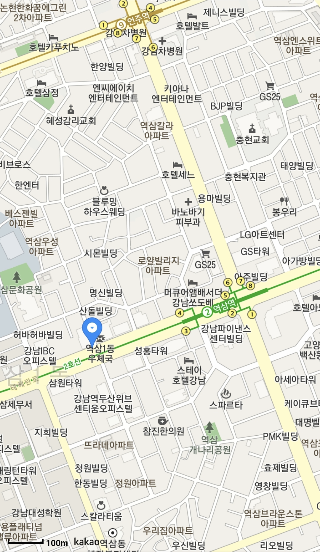
우선 웹뷰에서 카카오맵이 정상적으로 로드되었을 때 리액트 네이티브 앱으로부터 위치정보 데이터를 받기 위해 요청합니다. 아래 코드는 웹뷰에서 리액트 네이티브 앱에게 위치정보 데이터를 요청하는 전체 코드 예시입니다.
웹뷰 전체 코드 예시
활용예시
<template>
  <div ref="map" style="width:100vw;height:100vh;"></div>
</template>

<script>
export default {
  head() {
    return {
      script: [
        {
          src: `//dapi.kakao.com/v2/maps/sdk.js?appkey=${process.env.KAKAO_APP_KEY}&libraries=clusterer`,
        },
      ],
    };
  },
  data() {
    return {
      map: null,
    };
  },
  mounted() {
    this.$nextTick(() => {
      this.load();
      window.__WEBVIEW_BRIDGE__.send(
        "getGeolocationPosition",
        {},
        this.getGeolocationPosition
      );
    });
  },
  methods: {
    getGeolocationPosition({ lat, lng }) {
      this.setCenter(lat, lng);
      this.setMarker(lat, lng);
    },
    setCenter(lat, lng) {
      // 지도 중심을 이동 시킵니다
      this.map.setCenter(new kakao.maps.LatLng(lat, lng));
    },
    setMarker(lat, lng) {
      // 마커를 생성합니다
      const marker = new kakao.maps.Marker({
        position: new kakao.maps.LatLng(lat, lng),
      });

      // 마커가 지도 위에 표시되도록 설정합니다
      marker.setMap(this.map);
    },
    load() {
      const container = this.$refs["map"];

      const options = {
        center: new kakao.maps.LatLng(36.176134, 127.986741),
        level: 3,
      };
      this.map = new kakao.maps.Map(container, options);
      // console.log(new kakao.maps.Map)
    },
  },
};
</script>

<style>
</style>
구현예시
window.__WEBVIEW_BRIDGE__ 전역 스코프 window 객체에 __WEBVIEW_BRIDGE__ 객체를 추가하고, 리액트 네이티브 앱과 커뮤니케이션을 하기 위한 메서드를 구현합니다. 아래에서 좀 더 상세한 설명을 하도록 하겠습니다.
import { v4 as uuidv4 } from "uuid";
(() => {
  try {
    // if (!window.ReactNativeWebView) {
    //   throw new Error('window 객체에 ReactNativeWebView가 존재하지 않습니다.')
    // }
  } catch (err) {
    console.error(err);
    return;
  }
  const getUniqId = () => {
    return uuidv4();
  };

  window.__WEBVIEW_BRIDGE__ = {
    callbacks: {},
    init: function() {
      try {
        document.addEventListener("message", this.receive.bind(this));
      } catch (err) {
        console.error(err);
      }
    },
    receive: function(e) {
      const { name, data, id } = JSON.parse(e.data);
      try {
        if (!Object.keys(this.callbacks).find(k => k === id)) {
          throw new Error(`${id}에 해당하는 콜백함수가 존재하지 않습니다.`);
        }
      } catch (err) {
        alert(err);
        console.error(err);
        return;
      }

      this.callbacks[id](data);
    },
    send: async function(name, data = {}, callback) {
      try {
        if (!name) {
          throw new Error("인터페이스 이름이 존재하지 않습니다.");
        }
      } catch (err) {
        console.error(err);
        return;
      }
      const message = {
        id: getUniqId(),
        name,
        data: data || {}
      };

      this.callbacks[message.id] = callback;

      ReactNativeWebView.postMessage(JSON.stringify(message));
    }
  };

  window.__WEBVIEW_BRIDGE__.init();
})();
send 메서드
send 메서드는 첫 번째 매개변수로 함수의 이름, 두 번째 매개변수로 앱으로 전달할 데이터, 마지막 매개변수로 우리가 전달할 메시지의 고유한 콜백함수로 구성되어 있습니다. 우리는 메시지 객체를 생성할 때 uuid 모듈을 활용해서 고유한 키인 id값을 추가합니다. 그리고 메시지 객체의 id를 callbacks 프로퍼티의 키로 구성하고, 우리가 send 메서드의 마지막 매개변수로 전달받은 콜백함수를 callbacks 프로퍼티의 값으로 추가합니다. 그리고 ReactNativeWebView.postMessage(JSON.stringify(message)) 구문을 활용해서 리액트 네이티브 앱으로 메시지를 전달합니다.
send: async function(name, data = {}, callback) {
  try {
    if (!name) {
      throw new Error("인터페이스 이름이 존재하지 않습니다.");
    }
  } catch (err) {
    console.error(err);
    return;
  }
  const message = {
    id: getUniqId(),
    name,
    data: data || {}
  };

  this.callbacks[message.id] = callback;

  ReactNativeWebView.postMessage(JSON.stringify(message));
}
callbacks 프로퍼티
저희는 웹뷰에서 리액트 네이티브 앱으로 메시지를 전달할 때 특정 함수 이름과 데이터 그리고 id값을 전달합니다. 우리가 요청한 함수의 리턴으로 의도한 값들을 전달받기 위해서는 고유한 식별자와 고유한 콜백함수가 필요합니다. 이를 구분짓기 위해서 callbacks 객체를 활용해서 관리합니다. key는 uuid 모듈로 생성된 중첩되지 않는 고유한 키고, value는 콜백함수(callback function)입니다.
callbacks: {}init 메서드
웹뷰에서 앱에서 전달한 메시지를 받기 위해 document에 메시지(message) 이벤트 리스너를 등록합니다. message 이벤트 핸들러로 receive 메서드를 사용합니다. receive 메서드는 바로 아래에서 설명하겠습니다. receive 메서드에서 this를 __WEBVIEW_BRIDGE__ 객체로 지정하기 위해 bind 구문을 활용해서 this를 바인딩합니다. (this를 바인딩하지 않으면 자동으로 DOM 객체가 this로 바인딩됩니다.)
init: function() {
  try {
    document.addEventListener("message", this.receive.bind(this));
  } catch (err) {
    console.error(err);
  }
}
receive 메서드
리액트 네이티브 앱에서 전달받은 데이터를 파싱하고, 전달받은 데이터에 포함된 고유한 키인 id와 매칭되는 콜백함수를 전달받은 데이터와 함께 실행합니다.
receive: function(e) {
  const { name, data, id } = JSON.parse(e.data);
  try {
    if (!Object.keys(this.callbacks).find(k => k === id)) {
      throw new Error(`${id}에 해당하는 콜백함수가 존재하지 않습니다.`);
    }
  } catch (err) {
    alert(err);
    console.error(err);
    return;
  }

  this.callbacks[id](data);
}
웹뷰에서 사용하는 방법
웹뷰에서 우리가 구현한 __WEBVIEW_BRIDGE__ 인터페이스(interface) 객체를 사용하는 방법은 간단합니다. 핵심은 __WEBVIEW_BRIDGE__객체의 send 메서드로 함수 이름, 전달할 데이터 그리고 앱에서 전달하는 값을 전달받기 위한 콜백함수 설정입니다. 코드 예시는 아래와 같습니다.
window.__WEBVIEW_BRIDGE__.send(
  "getGeolocationPosition",
  {},
  this.getGeolocationPosition
);
리액트 네이티브 앱에서 위치정보 데이터를 받기 위해서 웹뷰에서 앱으로 요청합니다.
앱 전체 코드 예시
리액트 네이티브 앱 전체 코드 예시입니다.
import React, { Component } from "react";
import { View } from "react-native";
import { WebView } from "react-native-webview";
import { delay } from "../../utils";
import * as Geo from "expo-location";

const postMessage = (ref, res = {}) => {
  try {
    if (!ref) {
      throw new Error("postMessage:: 웹뷰 레퍼런스가 존재하지 않습니다.");
    } else if (!res.name || !res.data) {
      throw new Error("postMessage:: 필수 파라미터가 존재하지 않습니다.");
    }
  } catch (err) {
    console.error(err);
    return;
  }

  ref.postMessage(JSON.stringify(res));
};


const WEBVIEW_NAME_TYPES = {
  GET_GEOLOCATION_POSITION: "getGeolocationPosition",
};
export default class Location extends Component {
  getGeolocationPosition = async ({ id }) => {
    const { status } = await Geo.requestPermissionsAsync();

    const {
      coords: { latitude: lat, longitude: lng },
    } = await Geo.getCurrentPositionAsync({});

    postMessage(this.webref, {
      name: WEBVIEW_NAME_TYPES.GET_GEOLOCATION_POSITION,
      id,
      data: {
        lat,
        lng,
      },
    });
  };

  onWebviewMessage = (e) => {
    try {
      const result = JSON.parse(e.nativeEvent.data);
      const { name, data, id } = result;
      console.log(result);
      if (!this.hasOwnProperty(name)) {
        throw new Error(`${name}을 가진 메서드가 존재하지 않습니다.`);
      }
      this[name](result);
    } catch (err) {
      console.error(err);
    }
  };

  render() {
    return (
      <WebView
        ref={(r) => (this.webref = r)}
        source={{ uri: "http://192.168.80.237:3000/app/map" }}
        onMessage={this.onWebviewMessage}
        javaScriptEnabled={true}
      />
    );
  }
}
컴포넌트가 렌더링됐을 때 웹뷰(Webview) onMessage 이벤트 리스너에 onWebviewMessage 메서드를 이벤트 핸들러로 지정합니다.
render() {
  return (
    <WebView
      ref={(r) => (this.webref = r)}
      source={{ uri: "http://192.168.80.237:3000/app/map" }}
      onMessage={this.onWebviewMessage}
      javaScriptEnabled={true}
    />
  );
}
onWebviewMessage 메서드는 메시지 데이터를 전달받습니다. e.nativeEvent.data 값을 파싱하면 우리가 전달한 메시지를 확인할 수 있습니다.

우리는 웹뷰에서 메시지로 전달한 name(위 예시에서 getGeolocationPosition 이름으로 함수 이름을 전달)으로 메서드를 실행합니다.
onWebviewMessage = (e) => {
  try {
    const result = JSON.parse(e.nativeEvent.data);
    const { name, data, id } = result;
    console.log(result);
    if (!this.hasOwnProperty(name)) {
      throw new Error(`${name}을 가진 메서드가 존재하지 않습니다.`);
    }
    this[name](result);
  } catch (err) {
    console.error(err);
  }
};
getGeolocationPosition 메서드는 아래의 코드로 구성되어 있습니다. 리액트 네이티브 앱에서 위치정보 권한 동의를 받아야 위치정보 데이터를 받을 수 있어서 Expo의 expo-location 모듈을 활용해서 위치정보 처리를 합니다. Geo 객체의 requestPermissionsAsync 메서드를 활용해서 위치정보 동의를 요청받고, status 값이 granted라면 Geo 객체의 getCurrentPositionAsync 메서드를 활용해서 위경도 데이터를 받아옵니다. 매개변수로 옵션값들을 지정할 수 있습니다. (간단 예시라서 위치정보 권한 거부에 대한 예외처리는 제외했습니다.)
getGeolocationPosition = async ({ id }) => {
  const { status } = await Geo.requestPermissionsAsync();

  const {
    coords: { latitude: lat, longitude: lng },
  } = await Geo.getCurrentPositionAsync({});

  postMessage(this.webref, {
    name: WEBVIEW_NAME_TYPES.GET_GEOLOCATION_POSITION,
    id,
    data: {
      lat,
      lng,
    },
  });
};
postMessage 헬퍼 함수입니다. 위치정보 데이터를 받아오면 postMessage 함수를 통해 웹뷰로 메시지를 전달합니다.
const postMessage = (ref, res = {}) => {
  try {
    if (!ref) {
      throw new Error("postMessage:: 웹뷰 레퍼런스가 존재하지 않습니다.");
    } else if (!res.name || !res.data) {
      throw new Error("postMessage:: 필수 파라미터가 존재하지 않습니다.");
    }
  } catch (err) {
    console.error(err);
    return;
  }

  ref.postMessage(JSON.stringify(res));
};
'개발 > React Native' 카테고리의 다른 글
이 포스팅은 쿠팡파트너스 활동의 일환으로, 이에 따른 일정액의 수수료를 제공받습니다.


